Quick Start Guide
Contents: What is Vizloom? · Step 1: Visuals Library · Step 2: Import Songs · Step 3: Synchronize · Step 4: Create Video · Step 5: Render · What's Next?
What is Vizloom?
Vizloom is a procedural video editor built for DJs, producers, and artists. It helps you automate the link between music and visuals, so you can turn even very long shows into immersive, synesthetic journeys.
Starting with just a couple minutes per track, you can turn your music library into a library of music videos — ready to mix live in Rekordbox, Serato, Resolume, or other DJing/VJing software. Yes, there is other apps out there to slap visuals onto music... Vizloom is meant for leveling it up, making your audio-visual association feel intentional, carefully curated and ultimately high quality. Your videos will capture drops, breakdowns, and groove with precision. The result: a performance that brings sonic worlds and storytelling to light.
There are three types of source materials feeding this process:
- Art curation: you'll be building a personal collection of visual art over time;
- Music selection: if you are a DJ, you've been doing this already;
- Workflow Automation: slowly build out your own Vizloom "templates", which automate your visualization styles, and bring into one place the controls you need to rapidly customize each song.
Loading diagram...
Step 1: Set Up Your Visuals Library
Before creating videos, you'll need some visual assets. Vizloom comes with some templates to get you going (find the instructions in your welcome email).
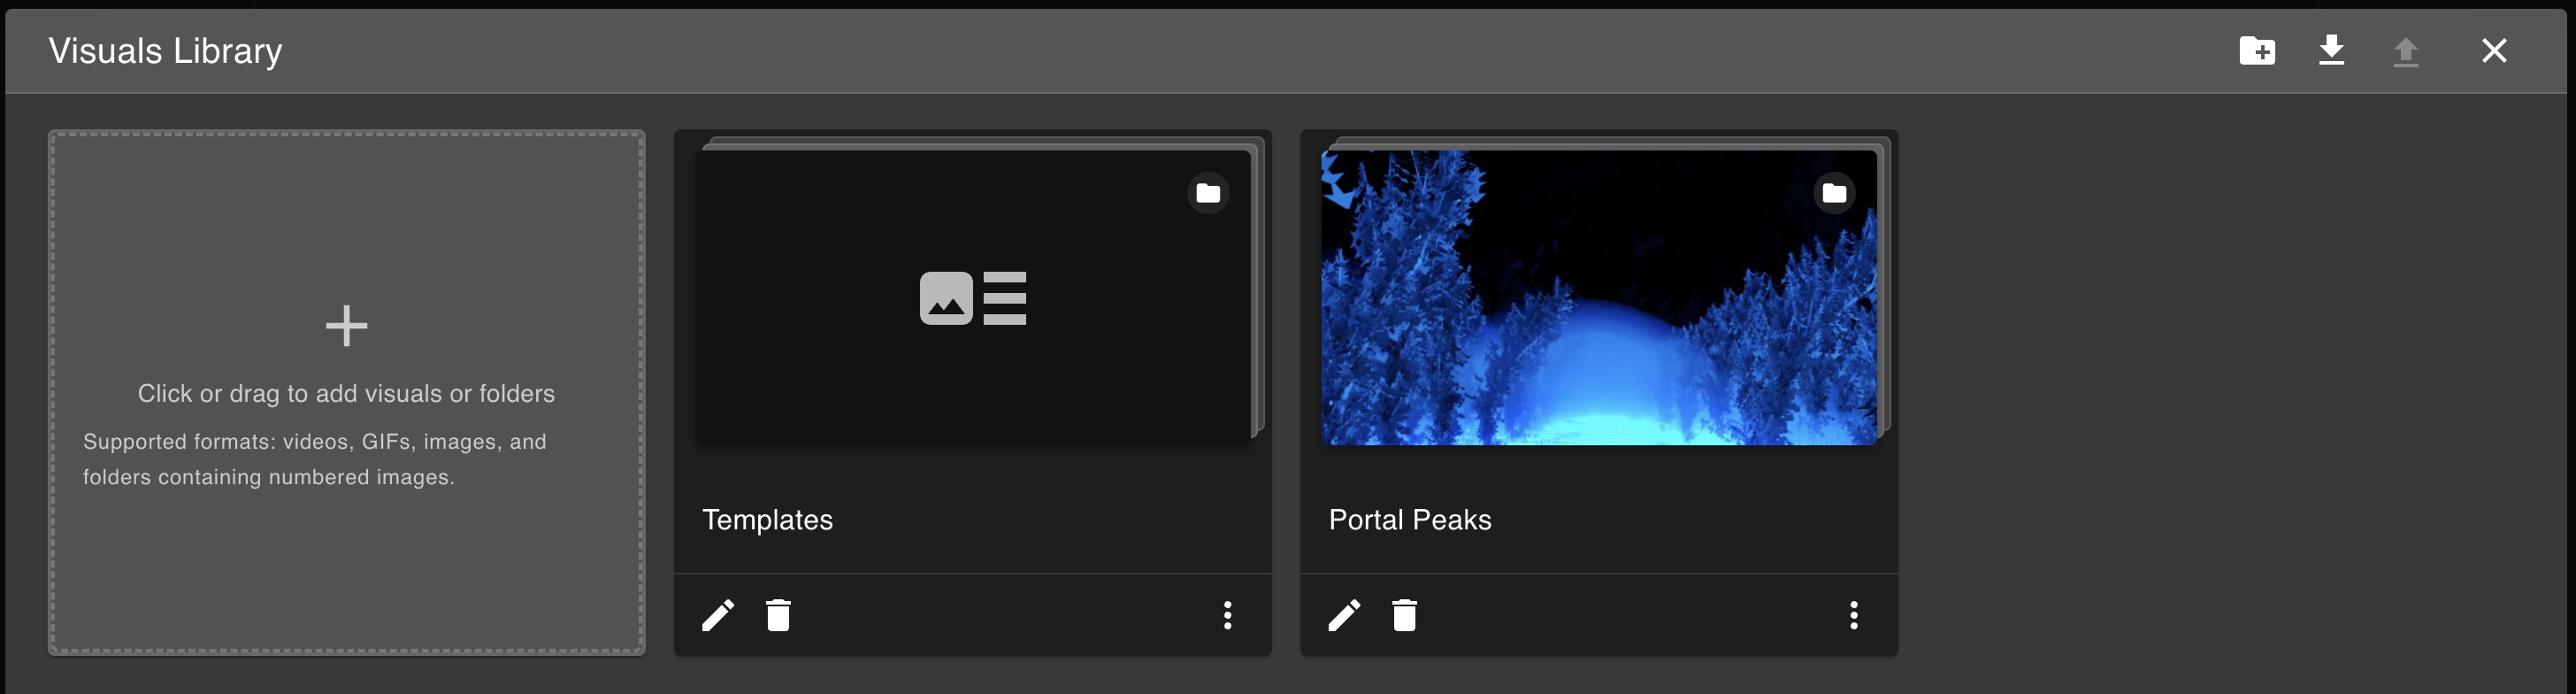
- Open the Visuals Library by clicking the purple button at the top of the window (it should open automatically on your first launch)
- Drag the template files onto it. Their contents will automatically get organized into folders.
You can also add your own visuals the same way: videos (.mp4, .mov, .webm), GIFs and images.
Your visual library is the foundation of your Vizloom workflow. Curate it in the same way you curate your music: keep things coherent with your music genres and the vision you have for the vibe you want to create.
Step 2: Import Songs
- Close the visuals dialog by clicking the X button
- Drag your music tracks onto the window
The analysis extracts the tags, BPM, and audio stems from your tracks. It generally takes a couple minutes, but it should leave enough bandwidth for you to get working on whichever tracks are already analyzed. Since for this tutorial we only have this one, while we wait let's familiarize with Collections.
Detour: Collections
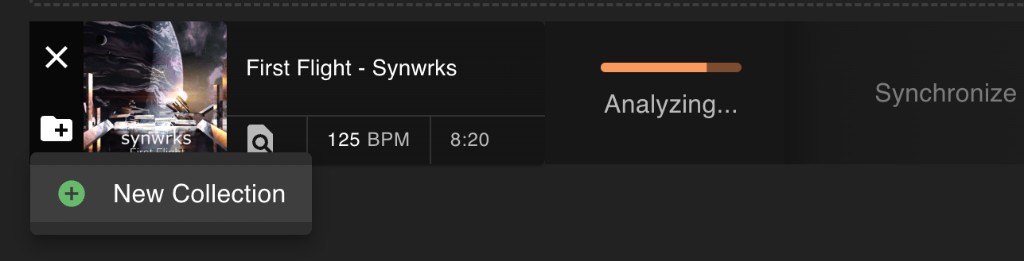
If you click on the Folder icon to the left of the song's album art, you'll be prompted to create a new collection. Let's click, call it "Tutorial" and confirm. This song is now part of the "Tutorial" collection.
If you click on the 3 lines button at the top-left corner of the window, you'll access the list of available collections. Collections are a way to organize your songs, and customize your workflows for specific genres, gigs or visual styles. The sliders button in the top-right corner will open the settings for that collection (or the default settings, if you are visualizing "All" songs).
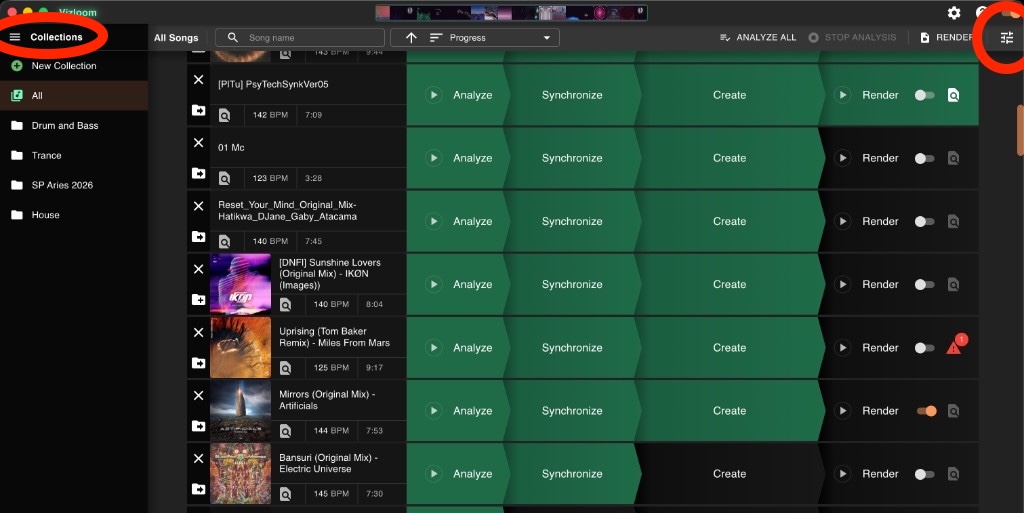
This screenshot is an example of what things look like once you start adding more songs and organizing them into collections. The collections and the settings buttons are highlighted in red.
Step 3: Synchronize the Beatgrid
Analysis should have completed by now. At this point we can click directly into the Synchronize tab.

Use the offset slider to align the beatgrid with your track. Here's how to get it right:
- Watch the visual clues — the beat bar should pulse in perfect sync with the kick, the clap with the clap etc...
- If it keeps going out of sync reset the offset, then try adjusting the BPM (the automatic analysis can sometimes be wrong).
- Click around the waveform — jump to different sections of the song to verify alignment
Most of the time the automatic detection is spot-on, but it's worth double-checking as it can be tricky to fix it later.
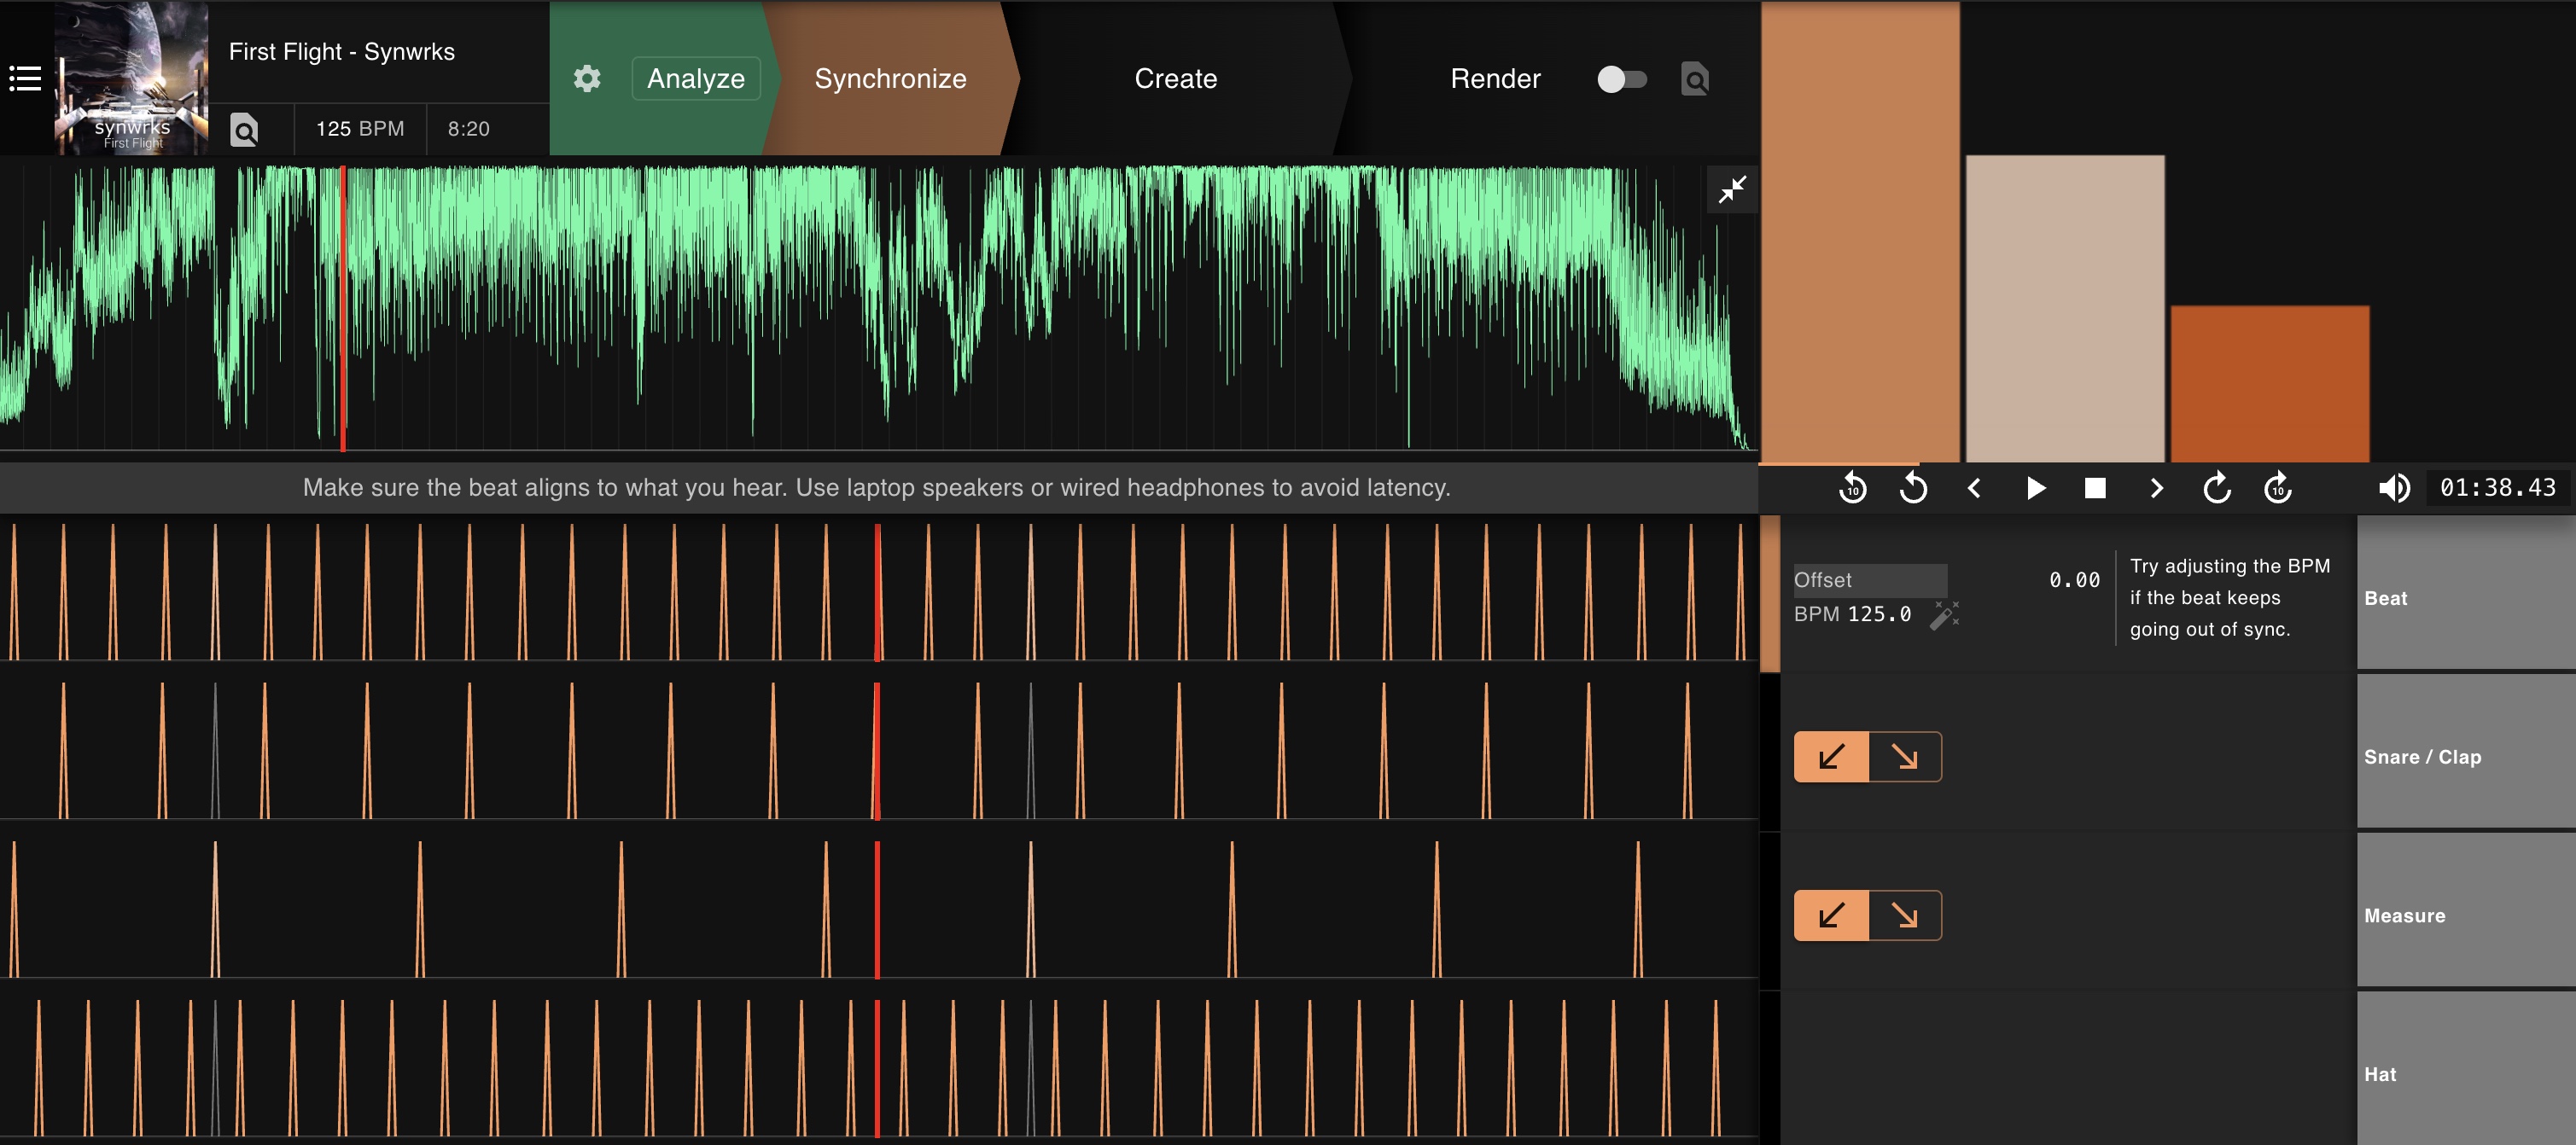
Note: HDMI adapters, bluetooth connections and the like tend to introduce lag, causing this syncing process to yield bad results. Use wired headphones / speakers or the speakers of your laptop directly if possible.
Step 4: Create Your Video
Click on the Create tab to start building your video.
Choosing a Template
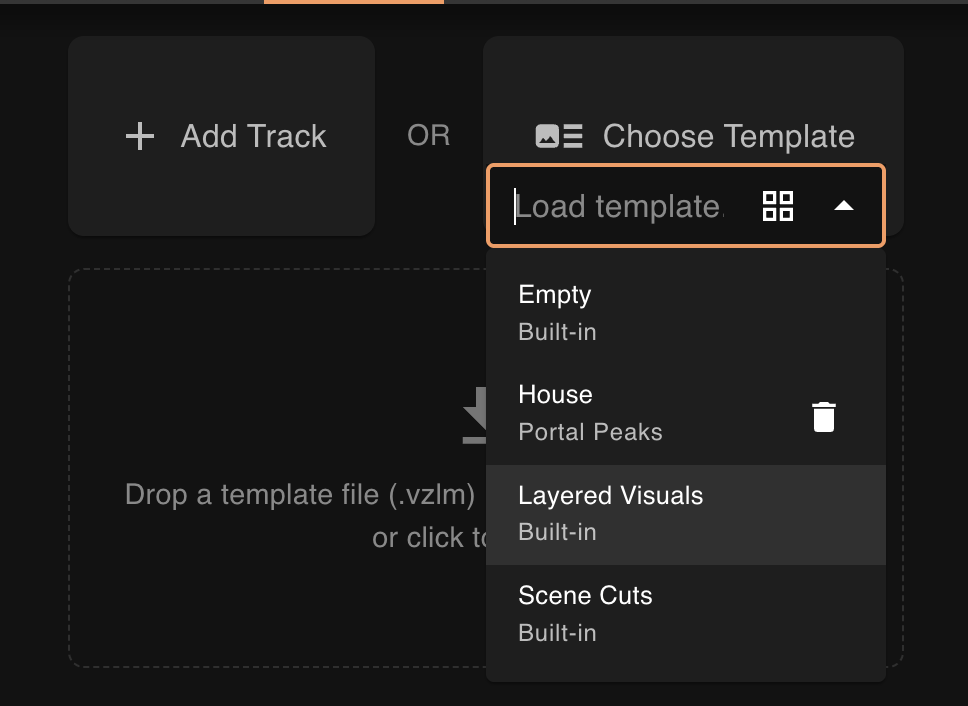
Pick the "House" template we just imported. This template layers elements of the scene on top of each other according to various elements of the music. This is just one possible stylistic choice of infinite ones, as every template can be reprogrammed in the nodes editors to do wildly different things.
This template will generate a first draft of the song's structure as soon as applied. Where the chart is down, there is a breakdown, a lull in the song (this can include intros and outros). Where it's up, the drums and bass are playing in full swing, and various visuals will be active to represent that energy. If you were to drag around the "sensitivity" slider, you'd see the results varying, effectively providing you with different options. Let's leave it at 0.5, and skip through the track (arrow keys to skip and space to toggle playback) to hear whether all drops and breakdowns seem to map correctly to what we hear.
In this case, I felt the need to only correct two breakdowns, marked with A and B in this image below.
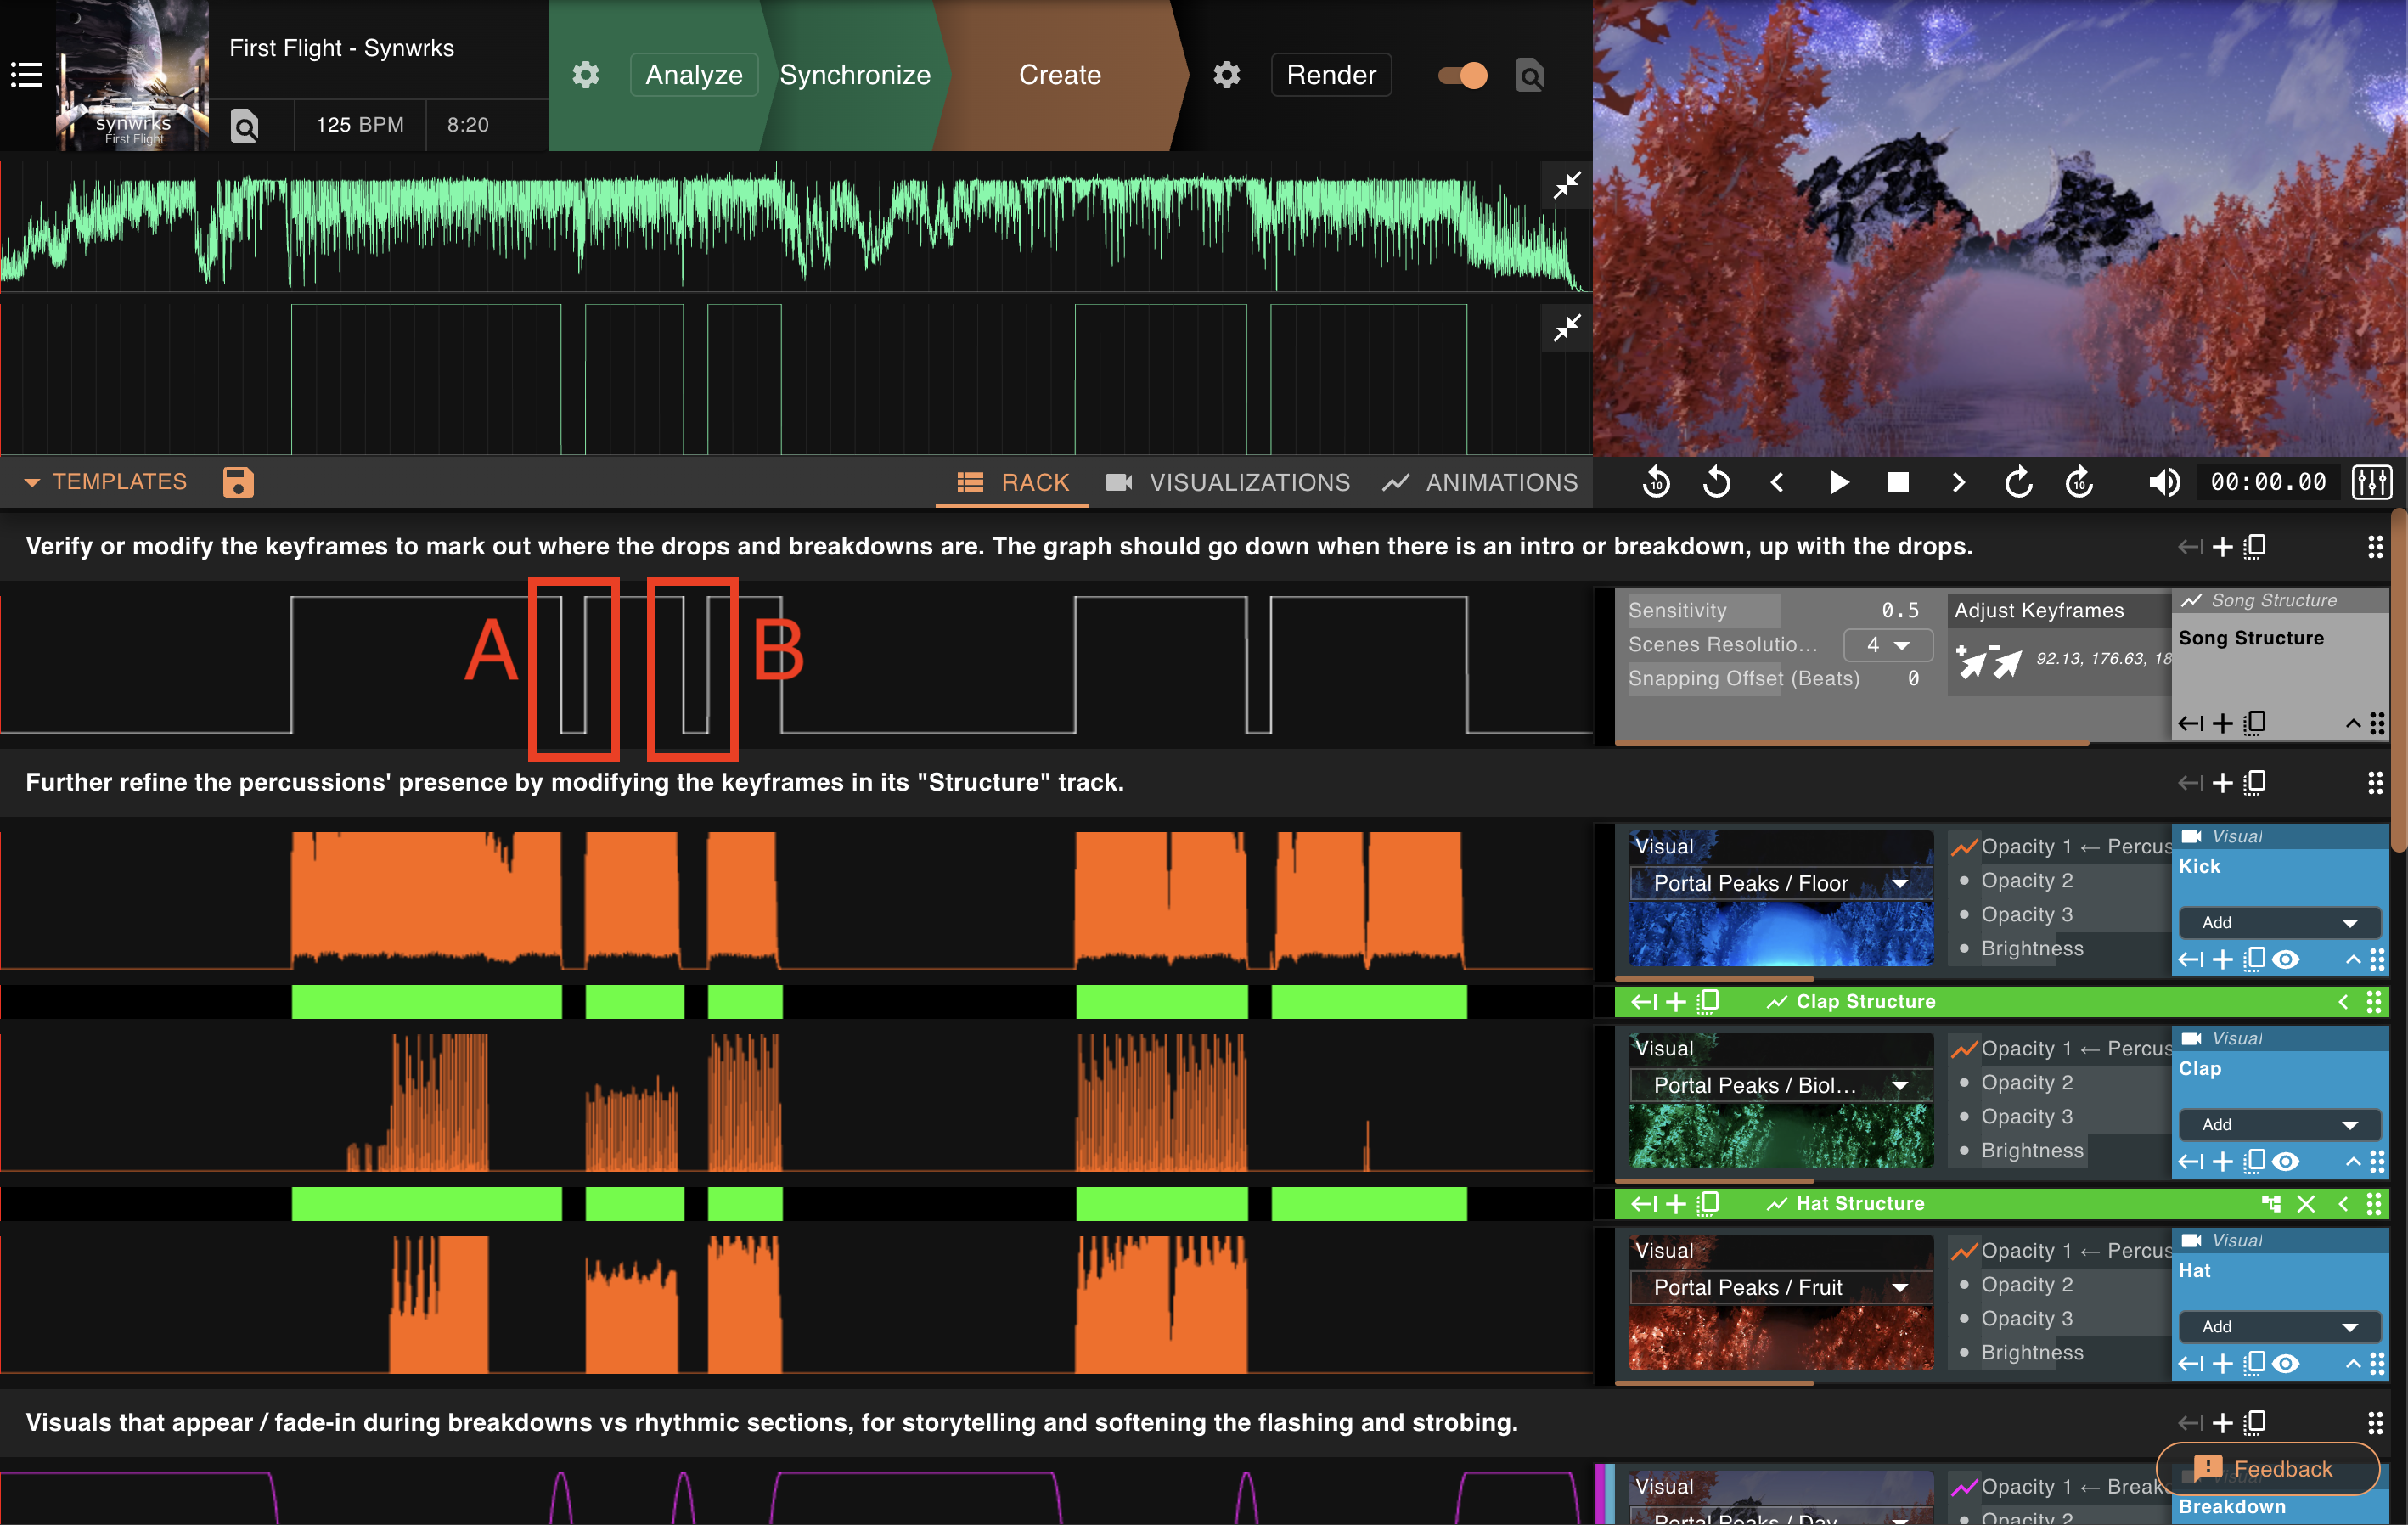
- Breakdown "A" is introducing a nice punctuation, as it's bringing about the light of day just as a more calm section of the song transitions into a more energetic one. It would be nice to keep it, but it is beginning a little too early, causing the visuals of the percussions to disappear while the kick is instead still playing.
- Breakdown "B" just doesn't feel right, let's remove it altogether.
In the first track ("Song Structure"), in the controls panel on the right, there is a "Adjust Keyframes" widget. You can scroll the controls horizontally to bring it fully into view.
Let's click the "+" cursor icon: this will make the Song Structure chart as well as the song's waveform become interactive, and highlight the keyframes as white horizontal lines. Those lines can be dragged around to properly align breakdowns and drops, new ones can be added by clicking on the charts, and they can be removed by holding ALT while clicking on them. Knowing all this, time to fix up the song's structure. Note how all charts in the rest of the page are also adjusting to the changes you make here:

- Let's shorten breakdown A: first, switch the quantization to "2" using the widget in the top-right corner of the chart. "2" here means "2 measures", a.k.a. 8 beats. You'll notice the light gray grid becoming more granular. Now let's hover the left keyframe of Breakdown A (the mouse cursor should change to two little horizontal arrows) and drag it just one tick to the right.
- Then let's keep "ALT" pressed, your mouse cursor will change to the "minus" variant. Click on the pair of keyframes of breakdown B to remove it.

Once you are done, the keyframes shoul look like this. Press Enter or Esc to confirm your change.
Congratulations! The Song Structure is now looking the way we hear it, and all other tracks have adapted accordingly. For the perfectionists out there: you'll notice "Track Structure" animations already inserted between some other tracks: these inherit their initial shape from the work you have done here, but allow you to further refine things just in the same way. Try modify their keyframes to see what happens.
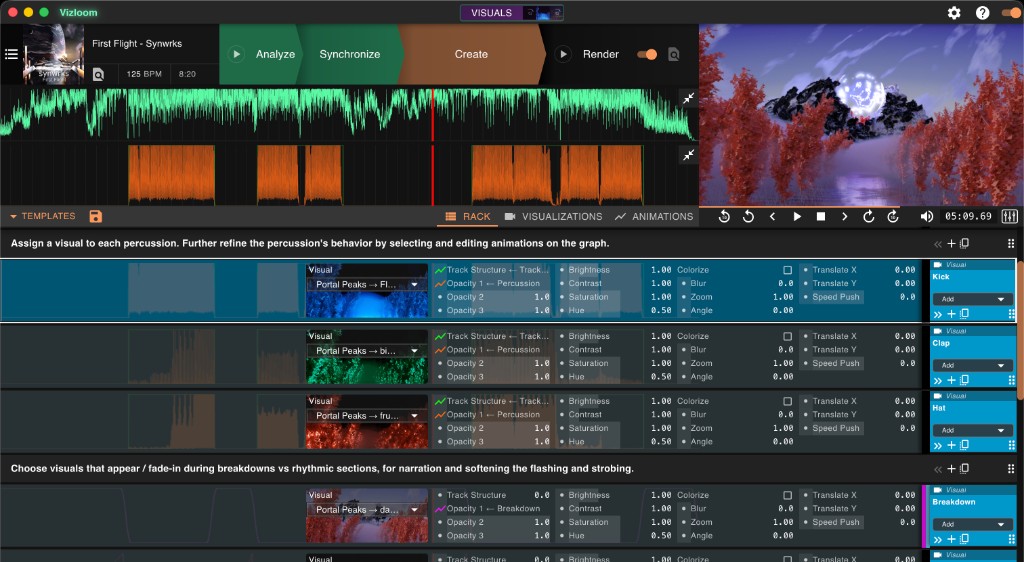
All tracks already have visuals assigned to them (but of course you can swap any of them out with any other media on your disk). You can further customize their look using the sliders on each track (press "tab" to have them all controls expand for easier access). Play the video to preview it, have some fun with it. In the end, it should look something like this:
Templates

You can save the contents of the editor as a new template any time. This allows you to iterate on your workflow and visual style, and easily apply it to more songs. If you are a visual artist, you can create a template to determine how your visual art is meant to respond to characteristics of music, and export it as a package for others to easily import and apply. Find out more on the Templates page.
Going Deeper
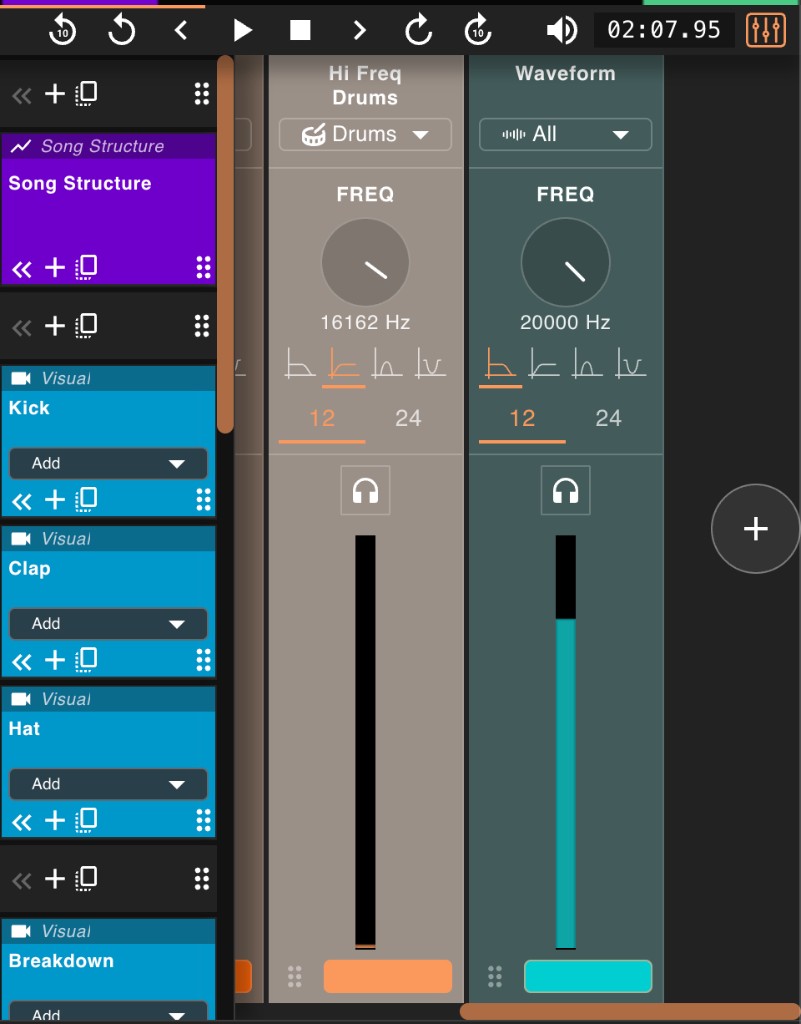
Through the button on the right of the playback controls, you can toggle open the de-mixer. If you click on the headphones buttons, or select any audio track by clicking on an empty space on it, you can quickly get an idea of the inputs going into this template.
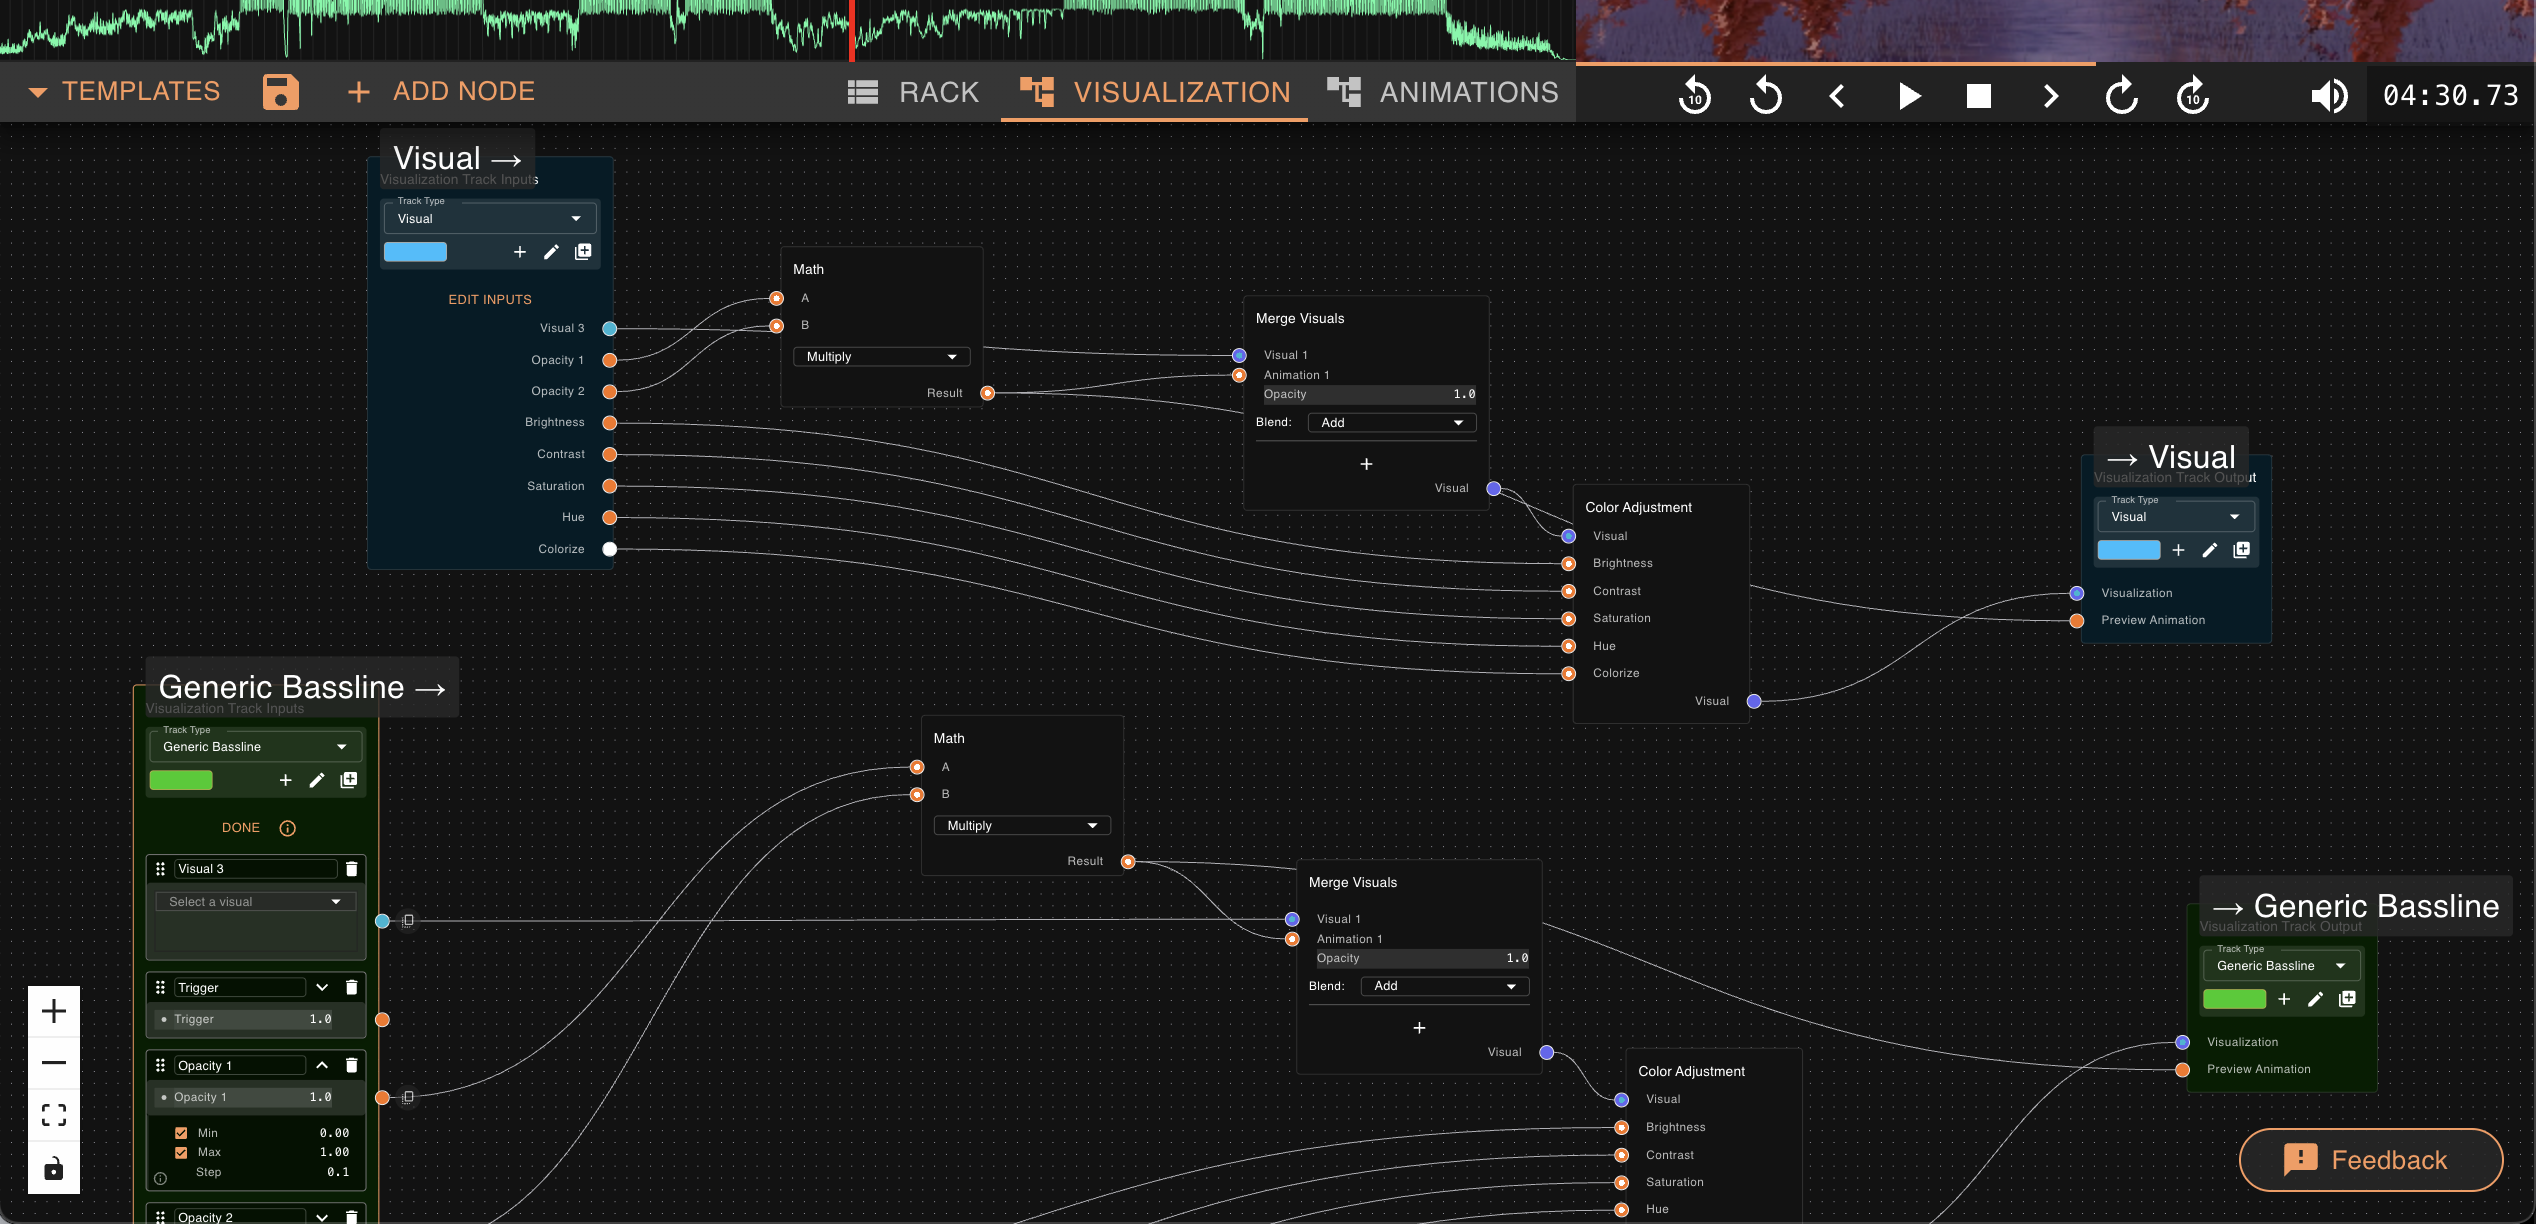
The Visualization and Animations tabs contain the node trees that define templates and program every aspect of their behavior. You can modify any template down to its most minute detail, from timing curves to visual parameters.
Step 5: Render
When you're happy with your video:
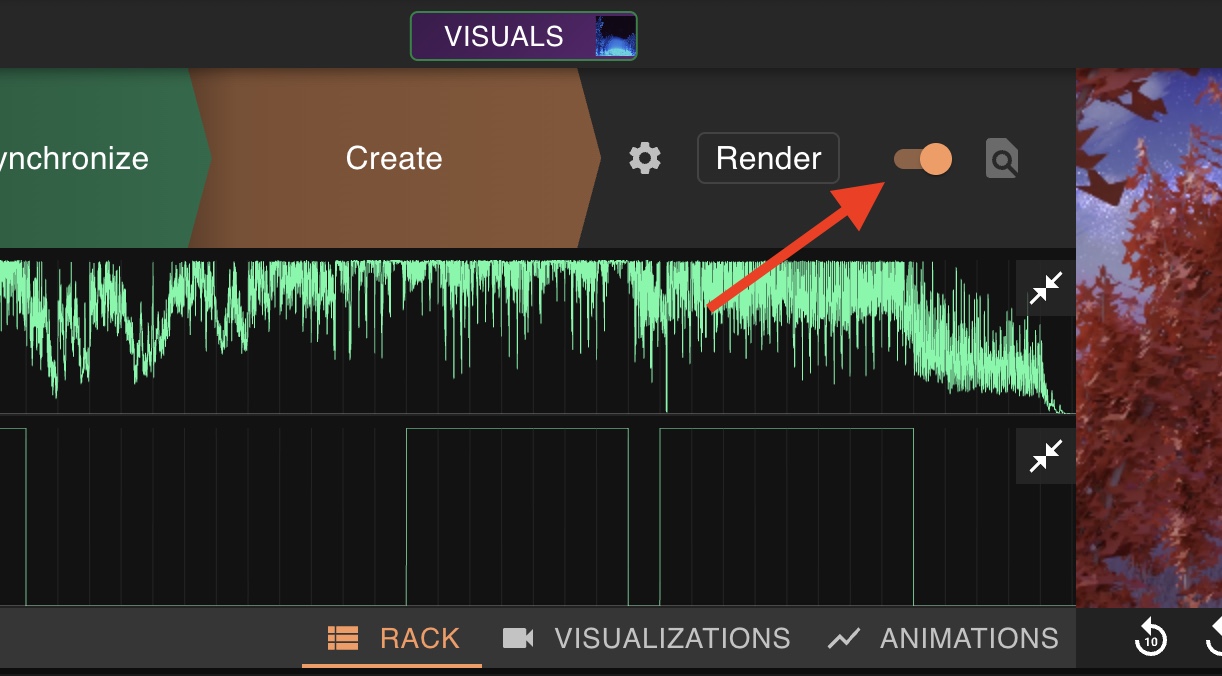
- Toggle the Render checkbox to mark the song as ready
- Move on to your next track, prepare its video, and so on... There is no set rule on the effort to spend on each song. If you are just fine-tuning a template you can get great results in just a couple minnutes. However this editor allows you to keep experimenting and being creative for as long as you like.
- When ready, go back to the songs view (button to the left of your song's metadata) and click Render Queued to produce the full-resolution videos (currently, that means 1920 x 1080).
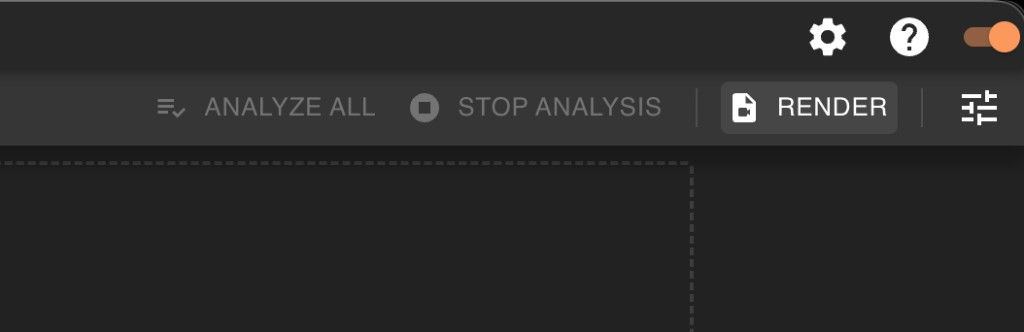
Pro tip: Prepare several songs, then click "Render All" before going to bed to let your laptop work overnight ;)
What's Next?
You've learned the basics! Here are some ways to level up:
- Join our Discord — There's a channel to crowdsource links to visuals, share your work, discuss ideas to improve Vizloom, etc.
- Follow our socials to stay updated on new features
- Share your work — Made a visual DJ set using Vizloom? Send it to info@vizloom.com to get featured!
Stay artsy! 🎵🎨